IMS Company
A trusted partner for the plastics processing industry, offering a wide range of high-quality, process improving products at competitive prices. We are a diversified distributor specializing in supplies, components, auxiliary machinery, and equipment. With 75 years of industry experience, our stocked warehouse ensures fast, reliable delivery, helping you maintain peak production efficiency. Whether you need innovative products, expert support, or tailored solutions, IMS Company has the expertise and resources to keep your operations running smoothly. Visit us at imscompany.com for more!




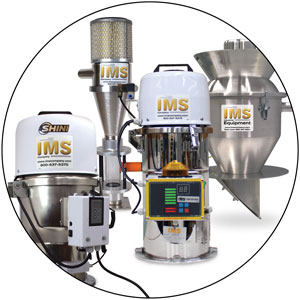
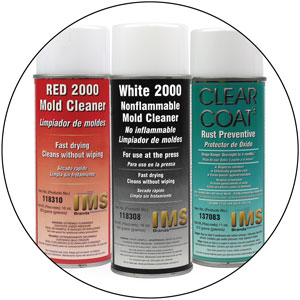
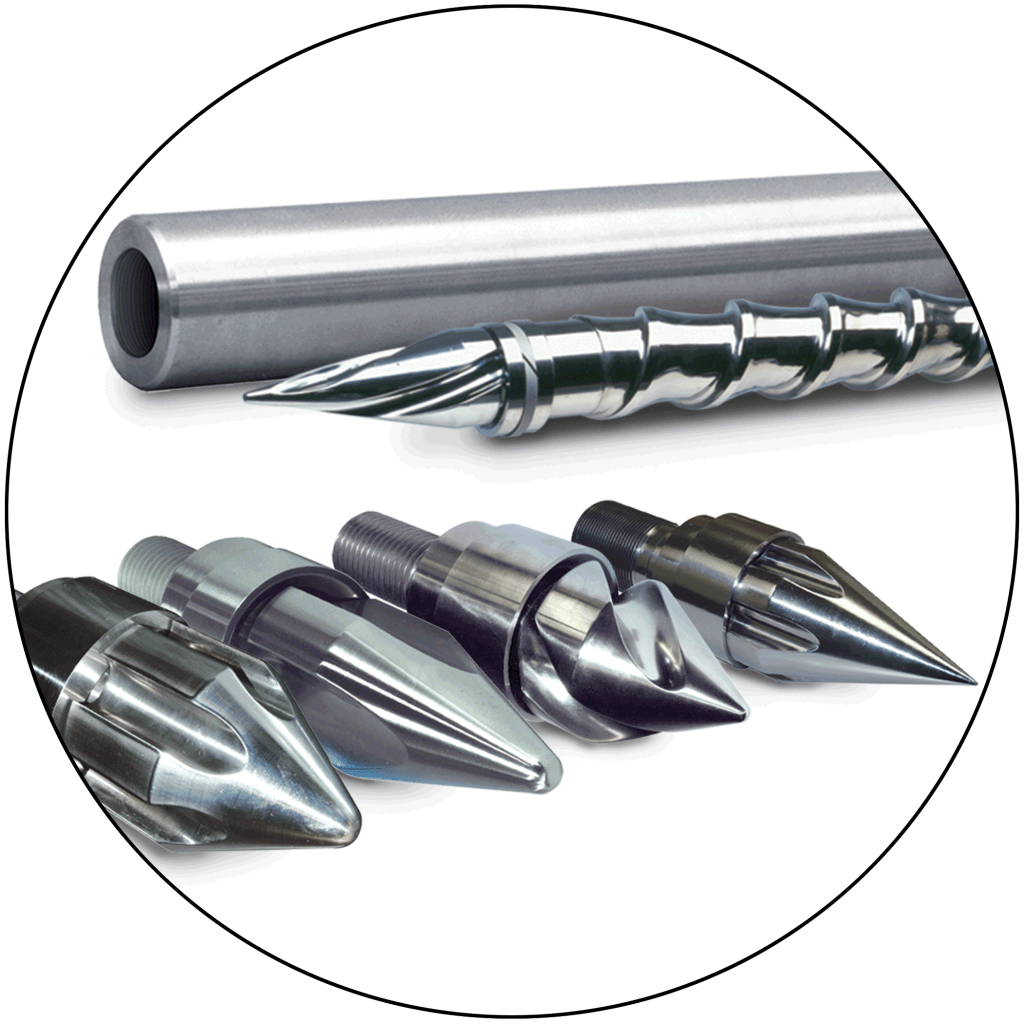


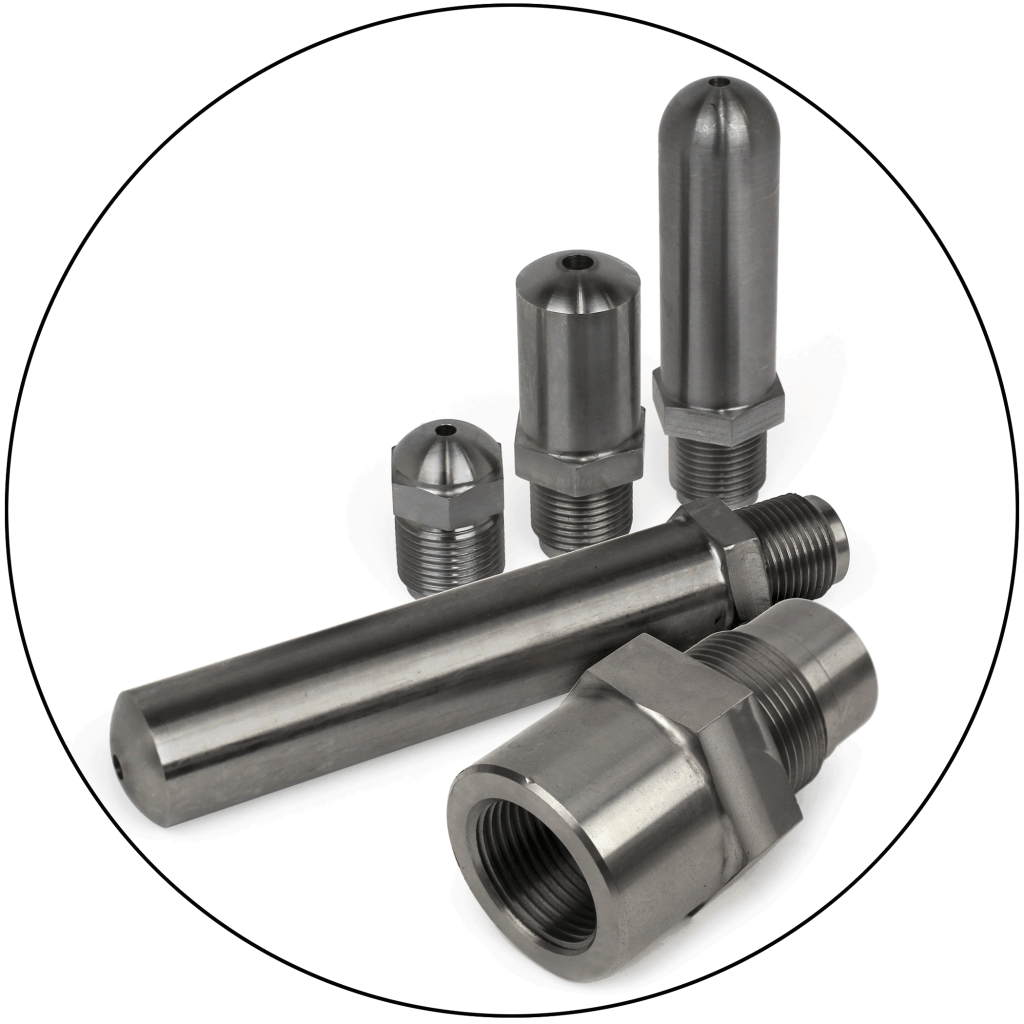
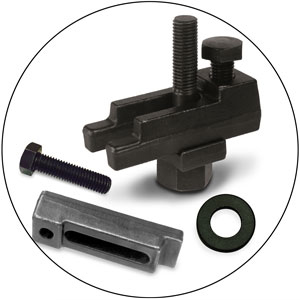

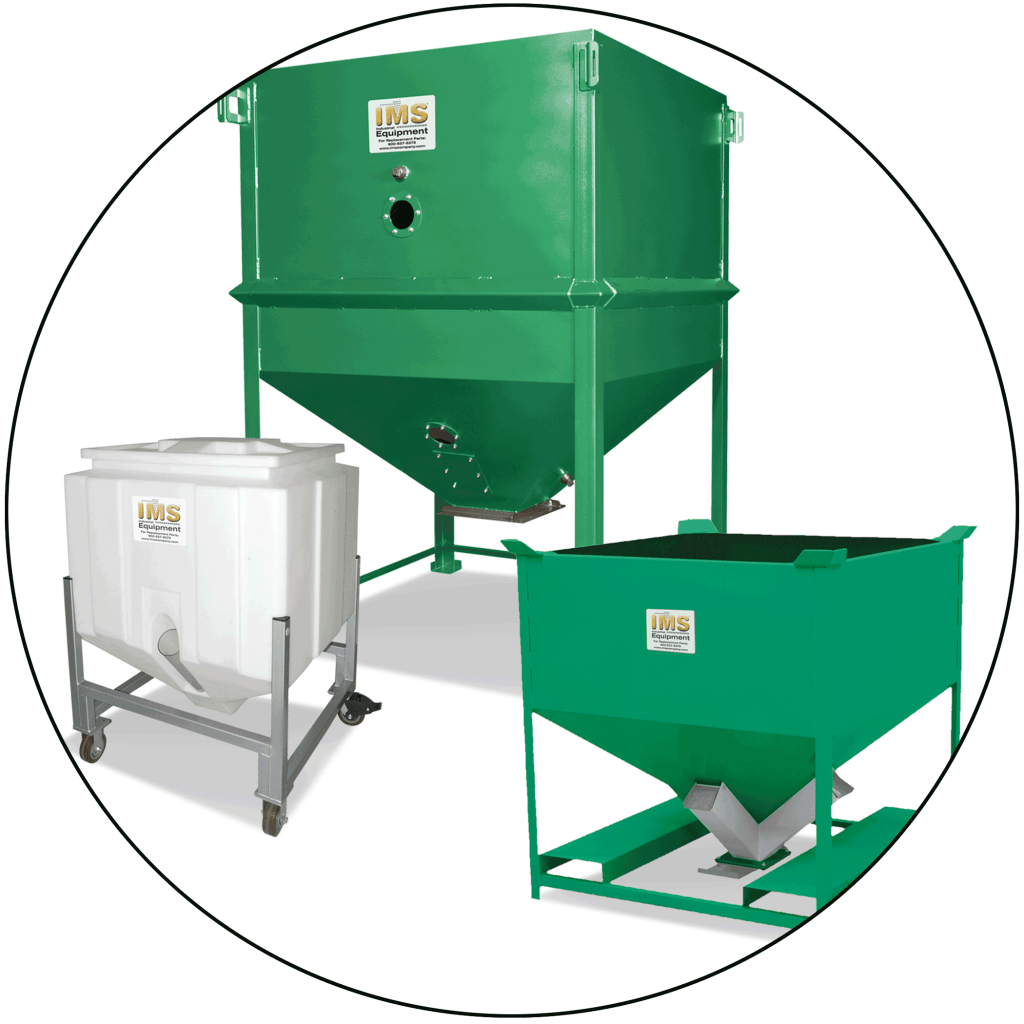
For 75 years, one thing has never changed at IMS — our single-minded focus on providing products and services designed to help your shop increase efficiency and ramp up productivity.
Check out IMS on YouTube!
Blogs
March 9, 2026 – Maximize Molding Performance with the Right Materials
July 28, 2025 – Why Keiba Gate Cutters Excel in Precision Cutting
June 3, 2025 – Sizing a Desiccant Dryer for Plastic Injection Molding
May 7, 2025 – Mold Cleaners
January 7, 2025 – Time to Purge
November 4, 2024 – Plant Shutdown
October 22, 2024 – Prepare Your Shop for Winter
September 11, 2024 – New Injection Press Setup
August 26, 2024 – D-limonene
August 14, 2024 – Mold Rust Prevention
July 9, 2024 – Mold Cleaner vs. Mold Release
March 25, 2024 – Part Diverting Systems
March 13, 2024 – Chill Out
February 22, 2024 – Why is Moisture a Problem
February 19, 2024 – What is a Vacuum Loader
February 5, 2024 – Injection Molding Nozzle Tips
January 29, 2024 – Metal Separation
May 30, 2023 – Benefits of Insulation
April 22, 2023 – Sustainability
March 20, 2023 – Dew Point Meter/Monitor
March 2, 2023 – IMS Lime Buster
March 1, 2023 – IMS Brody Ring
January 30, 2023 – Clean Room Manufacturing
January 1, 2023 – Heater Band Wiring
December 21, 2022 – IMS Select Drum Tumbler
December 8, 2022 – Plastic Granulators
December 6, 2022 – Mold Setup Cart
November 28, 2022 – Eliminate Static and Dust
November 18, 2022 – Extending the Life of Your Heater Band
November 2, 2022 – How to Set Barrel Zone Temps
September 9, 2022 – The Benefits of Extruder Screens
August 24, 2022 – Calculating Heat Load for a Circuit
August 17, 2022 – Purgex Purging Compounds
August 12, 2022 – Air Wipe
August 11, 2022 – IMS Custom Projects
August 4, 2022 – New Shini Hopper Loader Systems
July 21, 2022 – Quick Change Fittings – Thread Profile Sizing
July 19, 2022 – IMS Custom Project
June 20, 2022 – Safety First
June 15, 2022 – IMS Screw Tip Brody Ring
June 15, 2022 – Screw Material Guidelines
June 15, 2022 – Screw Tip Wear Issues
June 15, 2022 – Essential Barrel Information
June 9, 2022 – Mold Safety Checklist
June 2, 2022 – Why Choose High Quality Desiccant?
May 26, 2022 – Circulators 101
May 19, 2022 – Sizing a Chiller
April 25, 2022 – Mold Temperature Control Product Selection
April 19, 2022 – Selecting the Right Gate Cutter For Your Job
April 12, 2022 – Barrel Insulation Blankets
April 4, 2022 – Quick Mold Change
March 14, 2022 – Spiral Technology
February 17, 2022 – Screw Tips






-
Circulators 101
March 6, 2024
Circulators (Thermolators, Temperature Controllers) are essential components in injection molding processes, primarily utilized for controlling the temperature of molds so that as the part cools after injection, it maintains dimension, shape and structure – ensuring consistent quality and efficiency. Controlling the mold temperature is critical to good parts. You can get good melt flow, and the cavity can fill quickly and fully, but if the part is not cooled properly then a good melt flow means nothing.
Circulators need to be compatible with the injection molding machinery and seamlessly integrated into the overall manufacturing setup for efficient operation. Regular maintenance and monitoring of circulators are essential to ensure they continue to function optimally, thereby avoiding downtime and production delays. In advanced setups, circulators may be integrated into the overall automation system of the injection molding process, allowing for real-time monitoring and control of temperature parameters.
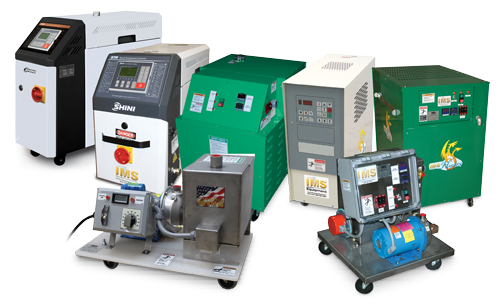
Here’s how circulators are typically used in injection molding:
- Cooling: Cools the molds after each cycle. Rapid cooling is essential for improving cycle times and overall productivity.
- Heating: In some cases, circulators may also be used for heating the molds to specific temperatures.
- Thermal Stability: Ensure thermal stability throughout the injection molding process, which is crucial for preventing defects and maintaining part quality.
- Energy Efficiency: Modern circulators often come with energy-saving features to optimize energy consumption during the temperature control process, contributing to cost-effectiveness and sustainability.
- Process Optimization: By precisely controlling the temperature of molds, circulators play a vital role in optimizing the process for different materials and product specifications.
Overall, circulators play a critical role in maintaining temperature control and ensuring the quality, efficiency, and reliability of injection molding operations. Their proper selection, installation, and maintenance are essential considerations for any injection molding facility.
IMS offers several options for temperature control needs: Circulators, Mold Temperature Controllers
You May Also Need:
Heat Transfer Fluids
A Quick Comparison Of Heat Transfer Mediums
• Water — Limited use range: 32° to 212°F. Encourages corrosion.
• Uninhibited Glycols — Allow temperatures to 250°F, but 2½ times more corrosive than water, if not neutralized.
• Automotive antifreeze — Contains corrosion inhibitors, but can foul heat transfer surfaces in less turbulent systems.
• UG-10 Ethylene Glycol — Low silicate formula provides good corrosion protection at a relatively low price.
• EG-17 Ethylene Glycol — Industrial inhibitors coat surfaces and impact pH for maximum corrosion protection.
• Pro-17 Inhibited Propylene Glycol — Non-Toxic Heat Transfer Fluid With Maximum Protection Against Acidity and Corrosion.
• PG-1 Hi-Heat Transfer Fluid — The Ultimate, Non-Toxic Fluid For Non-Pressurized Heating To 600°F.
• FF-1 Oil System Flushing Fluid — Improves heat transfer for faster cycles.
• PSC Plus Oil System Cleaner — Maximizes heat transfer for more parts and increased quality.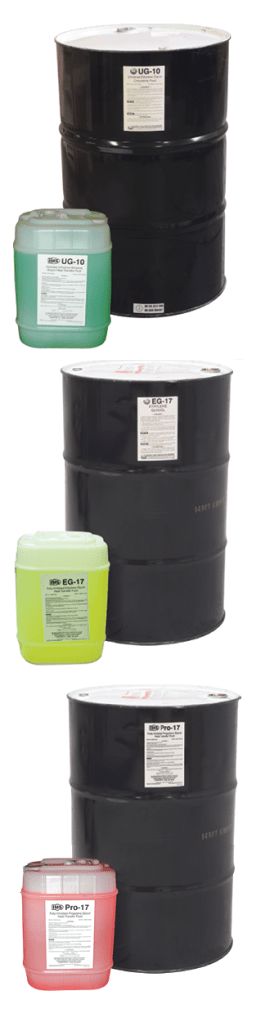
In addition, how efficiently any of the above units work is directly tied to how clean your mold passages are. Any buildup of scale can affect the transfer of heat. The passages need to be checked and maintained regularly. To help with that, IMS offers the Limebuster which helps remove the scale buildup in mold passages. Just 1/64″ of scale can reduce the heat transfer rate up to 40%. Using an acid/water mixture, the fluid is circulated by a low pressure pump. The fluid helps dissolve the scale slowly so good heat transfer can return. This type of unit also is used to clean heat exchangers.
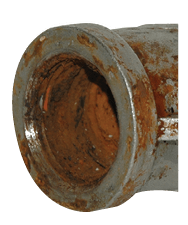
Before 
After 
While the above is basic in its presentation, the message is clear; IMS understands and can help. IMS has the expertise and the equipment to help maintain and even improve your process. Good parts and reduced scrap means you make money.
That is what we are here to help with. Call IMS Today for all your Injection Molding needs.
-
Spiral Technology
Cut Cycle Time – Mold Better Parts
IMS Select Exclusive Spiral™ End Caps, Screw Tips,
R-Screws and Hoppers will help you do both!Logarithmic spiral curves promote a faster, freer flow of material than conventional, flat tapers. A smoother, unencumbered flow produces better parts. These facts are why IMS incorporates spiral curves in each component of it’s exclusive SPIRAL™ System. The following is a brief history of how the IMS SPIRAL™ System developed.

Watch this 30 second video to see how much faster material
passes through the Spiral (right) versus Conical (left) Hopper.The introduction of electronic process controls back in the early 1980’s was without a doubt a technological breakthrough. For a lot of OTHER industries this was a huge step forward. For the injection molding industry, however, IMS questioned the logic of trying to computerize a process so full of variables and lacking in standardization.
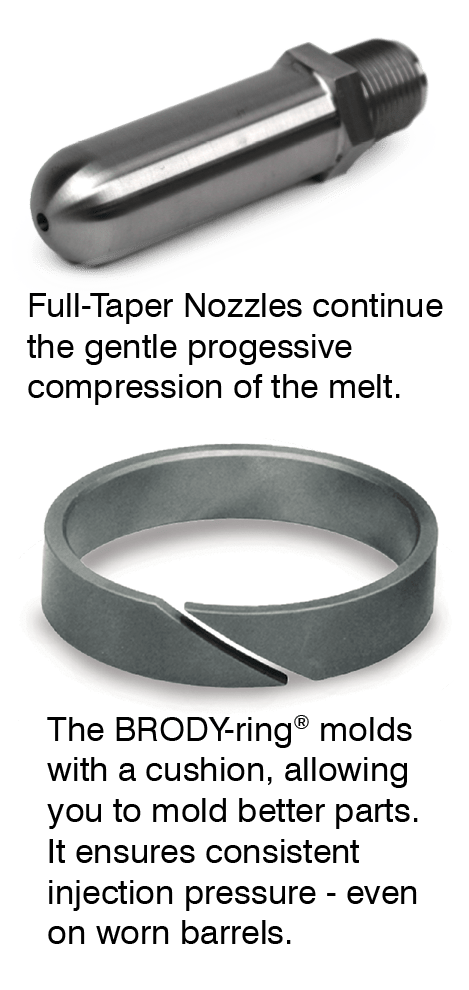
Prior to process controls, IMS had developed numerous individual products aimed specifically at improving part quality. Full Taper Nozzles and Screw Tip BRODY-Rings® are just a couple of examples. Each addressed a specific need and they all remain solid, successful products. It was the emergence of process control, however, that really started us thinking about the injection process as a whole (both the machinery and the material) and what could and should be changed in order to mold better parts.
It was already a proven fact that the current, restrictive R-Screw Process was stretching and deforming the molecular bonds of our plastics and seriously affecting finished part strength. We needed to find ways to get the plastic from the hopper to the mold with the least amount of damage possible. We found that this problem could be solved, in large part, by the replacement of all standard, flat internal tapers with smoother, gentler, logarithmic spiral curves.

The more gradual compressing of the material, plus the resulting coanda effect (that is, the phenomenon of material flow tending to follow closely along the wall contour of a passage), greatly eased the strain on the plastic’s molecules and the effects on the material’s inherent properties.
A. In 1986, IMS first used this technology in the development of their revolutionary Spiral™ End Caps. The results, as projected, were impressive. Parts were stronger and more dimensionally stable. Older presses equipped with these new end caps were actually producing higher quality parts than new presses with traditional style caps.

Spiral™ End Cap 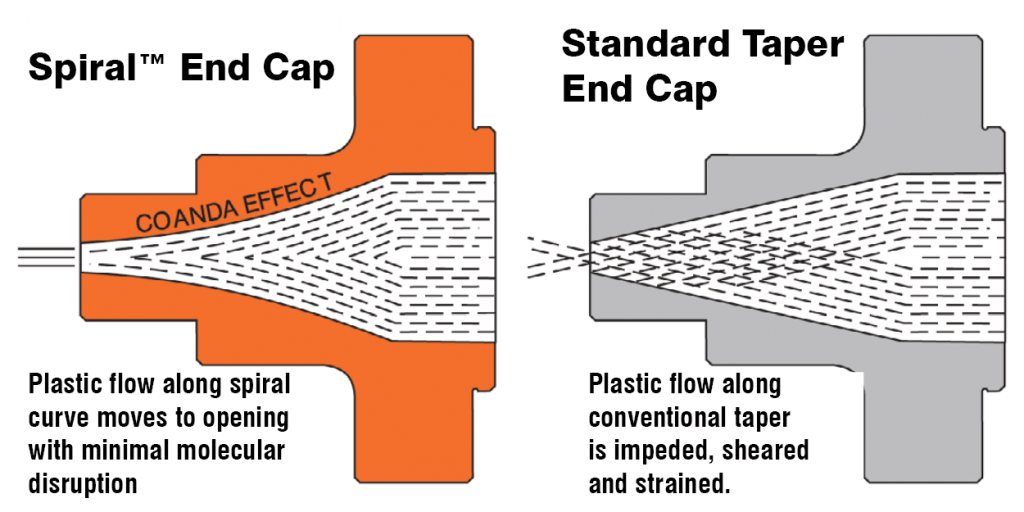
Spiral-Passage Barrel End Caps Coalesce The Melt
Without Damage to the Molecular Structure.B. Next IMS focused its attention on the Screw Tip. Their existing melt valves with narrow sliding ring and anti-blow- by BRODY-Ring® seal were already proven effective at maintaining shot control. But it was the development, in 1988, of a unique, Spiral™ front end that made IMS Spiral™ Screw Tips the least restrictive tips ever produced. The reduction of strains, flow lines and shear-induced heat in the melt improved part strength and quality significantly.
Another innovation was the introduction of the Thermally Compensated R-Screw. Research showed that installation of a heat tube in the front end of the screw would effectively transfer excess heat from the compression zone back to the transition zone, where it could be reused to assist in the melting of incoming pellets. Screw wear from unmelted pellets was dramatically reduced and the ability to turn down front end heat had a direct and positive effect on cycle time, part quality and reject rate.
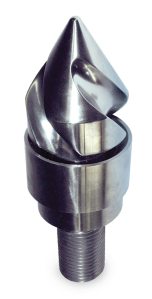
Easy-Flow (Spiral-Discharge) Screw Tips with Brody-Ring®
Advance the Melt Without Strains or Shelter HeatC. Next step, the feed hopper. No matter what their diameter or height, they all had the same straight taper to the machine intake. At least that’s the way it was prior to 1988. Consequently, they were all prone to bridging and surging. There wasn’t a single OEM feed hopper that could guarantee consistent, even feeding of the pellets to the screw. IMS found that a logarithmic Spiral Curve in place of the straight taper produced astounding results. Tests showed that whether the material was virgin or regrind, or whether the hopper was full or nearly empty, all the material moved all the time in a steady downward flow. Hence, IMS Spiral™ Hopper was born. Their effect on part weight, part dimensions, and overall part consistency, not to mention the flowability of most stubborn materials, is remarkable.

D. Finally IMS Spiral Technology was applied to the screw – more specifically, the screw flights. With IMS Spiral™ R-Screws:
- Pellets move forward in a more controlled, gentle tumble.
- Pellets begin melting sooner and proceed in a far more efficient and orderly manner.
- Pressure is provided by the lateral movement of the screw (as it should be) – NOT by the compressing of the material by the screw flights, as is the case with all existing injection screws.
Nearly 30 years since the introduction of the reciprocating screw, the IMS Spiral™ R-Screw was the First and Only screw developed expressly to reduce molded-in stress and strain. Research has revealed the injection machine doesn’t work as hard and produces more consistent quality parts.
IMS Exclusive Spiral™ Retrofit Components can improve the IMS Exclusive Spiral™ Retrofit Components can improve the performance of any injection press regardless of age, make, or model. They can also significantly increase your bottom line. Inquire today for more information!
When a Spiral Hopper is Likely a Better Choice
You should strongly consider a Spiral Hopper if:
- You run mixed batches or often operate with hopper partly full (versus maintaining full inventory).
- Materials are challenging: regrind, irregular shapes, high moisture sensitivity, etc.
- Your quality control is tight: need shot-to-shot consistency, minimal defects from pellet feeding issues.
- Productivity is critical, and cycle times are being impacted by material feed inconsistencies.
- You’re willing to invest a bit more up front for better performance and less downstream defects / maintenance.
When Conical Hopper Might Be Enough (or Preferable)
- If you run with hopper nearly always full, with flowable, “easy” materials.
- When initial cost or capital constraints are tight.
- Simpler operations where the benefit from Spiral design won’t offset the cost.
- If you have existing equipment and retrofitting or replacing hoppers is difficult or costly.
-
How to Set Barrel Zone Temps in Injection Molding
November 2, 2022
When setting up a new or existing mold, there are multiple variables the processor must handle. First on the list is setting up the barrel zone temperatures. This allows operators to spend less time waiting for the machine to warm up so that they can prepare for production.

Nevertheless, the question remains of what temperature we want the melt to be, and what should the temperature profile of the barrel zones be. If you were to ask a panel of molding professionals, you’d find the common denominator in making quality parts is setting the correct melt temperature. Incorrect temperature settings can cause a multitude of problems such as resin waste and poor part performance.
Ideally, a molder should always consult with their resin supplier. The supplier will give them temperature recommendations for both drying time and molding, and in some cases, even how to set the heat profile.
However, the discussion isn’t that simple and doesn’t end there.

Most injection molding machines have up to 5 individual heating zones. To begin, the processor picks a target melt temperature. No matter your experience, it’s best practices to check with the manufacturer’s recommendations. An excellent place to look for this information is on material specification sheets where you will find the suggested temperature range. A rule of thumb is to select something near the center of that range. This gives you the flexibility to adjust the material temperature up or down and still be within range. From here, you will begin to set the barrel zone profile.
Most barrel heating zones are set with a gradually increasing temperature profile from the rear zone to the metering (front) zone. There are a few exceptions to this, such as if you’re molding crystalline or polycarbonate materials. This is because the properties of these materials can be hard to heat to their processing temperature.
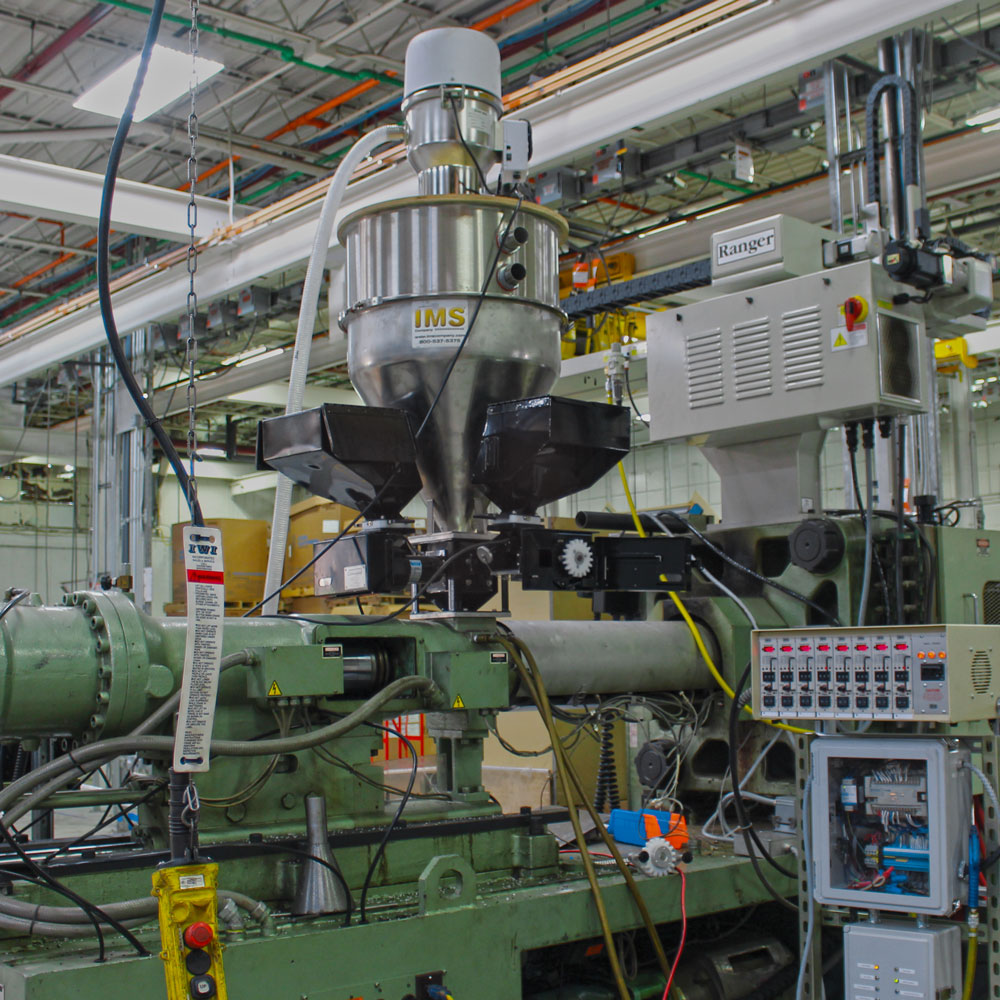
When the rear zone is too low, it can cause air to be trapped in the plastic, resulting in air bubbles in the mold sockets.
If the rear zone temperature is too high, it can cause the plastic to melt in the feed throat. This results in blocking the flow of granules into the barrel. It’s a waste of energy, as most of the heat produced is taken away by cooling water produced from the hopper feed.
If you’re looking to adjust the melt temperatures, you will do so in the middle zone. When heat is added to this zone, any temperature deviations are eradicated due to the heat being rigorously mixed through screw rotation before any plastic can amass ahead of the screw.

This is sometimes referred to as a “pyramid” profile. This is where the heat ramps up to its highest point in the center zone, then gradually drop down towards the front zones.
An additional step that can be taken is to wrap your barrel in insulation blankets. This helps with maintaining consistent heat by keeping the heat in the barrel. Heater bands minimize barrel heat loss, reduce electrical use, and help keep energy costs down. Click to read our Barrel Blanket ROI Study.

What have we learned? The optimal way to set barrel temperatures is to closely maintain them. Make sure to slowly increase the melt temperature as the plastic flows through the screw flights. As it approaches the front zone, just ahead of the screw, avoid adding or removing heat because, in the front zone, the screw cannot mix any unevenly heated plastic.
At IMS, we stand by our customers and work with you to maintain and improve your processes. We believe in saving you time and money while reducing scrap and supplying quality parts. Let us show you why we’ve been the trusted source of supplies, components, auxiliary machinery, and equipment for over 70 years.
-
The Benefits of Extruder Screens
September 9, 2022
Whether you are producing plastic bottles, caps, or clothing, polymer material needs to be formed into a desired shape. The extrusion process is often used to produce these shapes.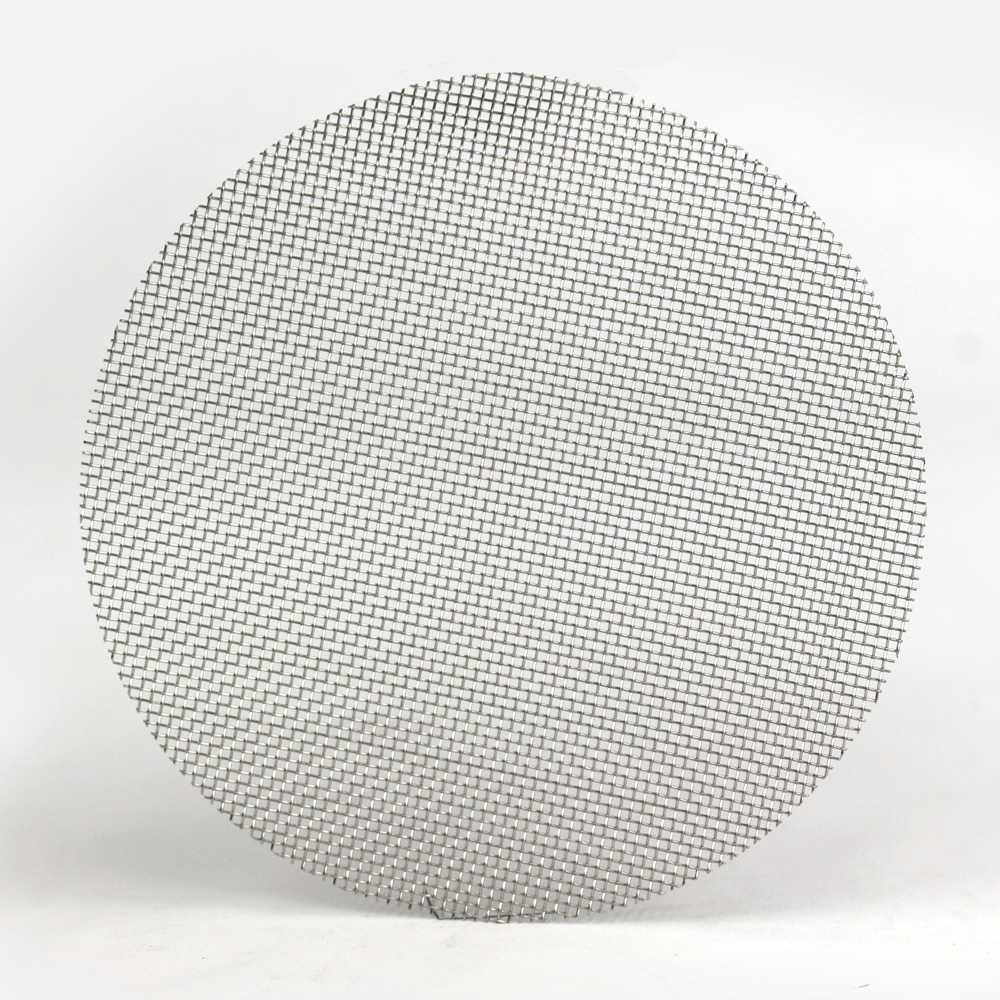
While there are many circumstances that can cause product failure, contaminants in plastic are the most common. Removing contaminants from the melt is the common focus manufacturers share in an effort to produce quality products.
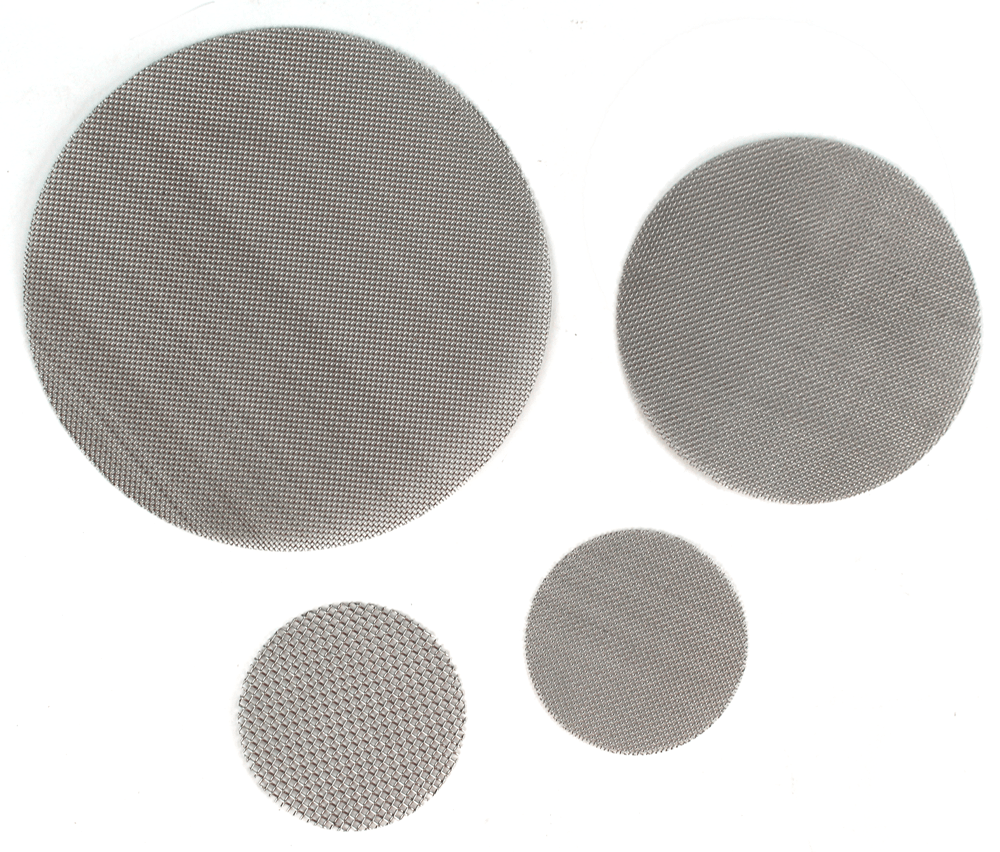
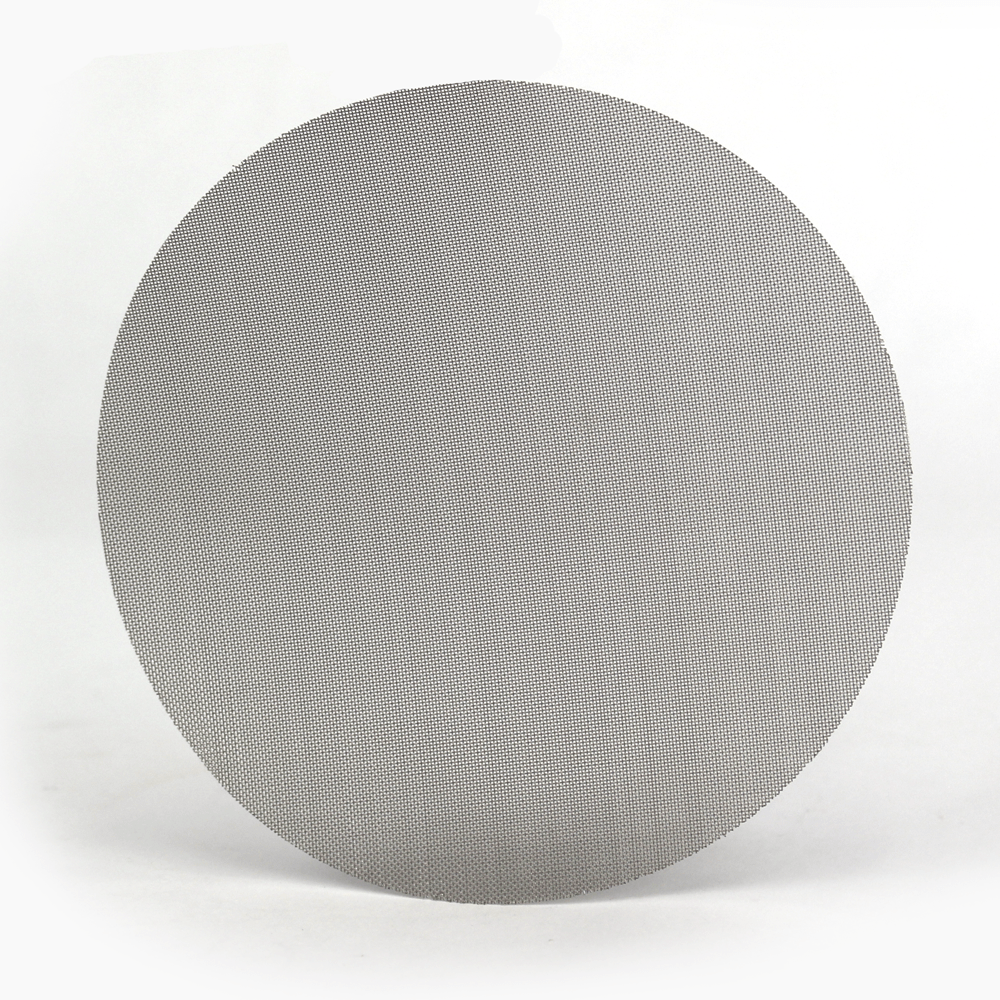
Extruder Screens, commonly known as screen packs, are woven wire filtration systems welded together and made into a variety of shapes and sizes specific to production needs. Melted material is pushed through this wire mesh screen to remove any contaminants. Depending on the level of decontamination and pressure requirements, different layer configurations and mesh opening sizes can be used.
No matter the shape or size, IMS has the extruder screens to fit your needs. Available in plain (carbon) steel and stainless steel, we also offer made-to-order extruder screen packs. For all your extrusion needs, trust the team who has been servicing Extruders for over 65 years.
-
Calculating Heat Load for a Circuit
August 24, 2022
Application Procedure
Use the following formula and method to calculate heat load for one cooling circuit. This will help determine suitability of the Smartflow Mold Temperature Regulator to your process.
- Select material from the table at right and calculate BTU/hr using the formula below. Shot weight is the total drop
including cold runner (if any).
BTU/lb x Shot Weight (oz.) x 225 = BTU/hr
Cycle Time (sec) - Find BTU/hr along the X axis of the graph below. Locate the desired steel temperature along the Y axis of the graph. Find the spot where the X and Y values intersect.
- The graphed line nearest this intersection point represents the difference in temperature between the incoming water and the Mold Temperature Regulator set point (ΔT).
- The Smartflow Mold Temperature Regulator should work in your application if the sum of the incoming water temperature and the ΔT value is between 80° and 120°F.
Every mold is different! The effectiveness of the Mold Temperature Regulator relies on the ability of the resin shot to heat the mold, and the efficiency of the cooling lines inside the mold.
NOTE: These graphs and information are intended as a general guide for sizing and initial setup of the mold temperature regulator. Due to the different mold designs, results may vary from the graphs.
Typical Heat Values of Plasticized Resin*
Material BTU/lb
ABS …………………………………………………………… 81
Acrylic ………………………………………………….. 109
Nylon …………………………………………………….. 183
Polycarbonate ……………………………………. 112
Polyethylene – High Density ……… 276
Polyethylene – Low Density ……… 202
Polypropylene ………………………………….. 291
Polystyrene …………………………………………. 88
SAN ………………………………………………………… 88Example:
A molder is using nylon material in a four-cavity mold with a shot weight of .90 ounces (including the runner). The cycle time is 12.5 seconds with a mold steel temperature of 180°F. BTU/hr formula is as follows:
183 BTU/lb x .90 oz. x 225 = 2964.6 BTU/hr
12.5 secSee the One Water Circuit Graph below left for the differential temperature (ΔT) value. Add 70°F incoming water temp. to
the ΔT value (20°F). This is the beginning set point for the mold temperature regulator, and may be adjusted as needed.
Mold Temperature vs. Heat Input for 36-1/2” Water Circuit and
Five Different Values of ΔT
Mold Temperature vs. Heat Input for 21-1/2” Water Circuit and
Five Different Values of ΔTThese graphs were generated by simulated molds, with BTU input varied by electric heaters. The water line path through each mold was 7∕16″ dia.
- Select material from the table at right and calculate BTU/hr using the formula below. Shot weight is the total drop
-
Purgex Purging Compounds
August 17, 2022
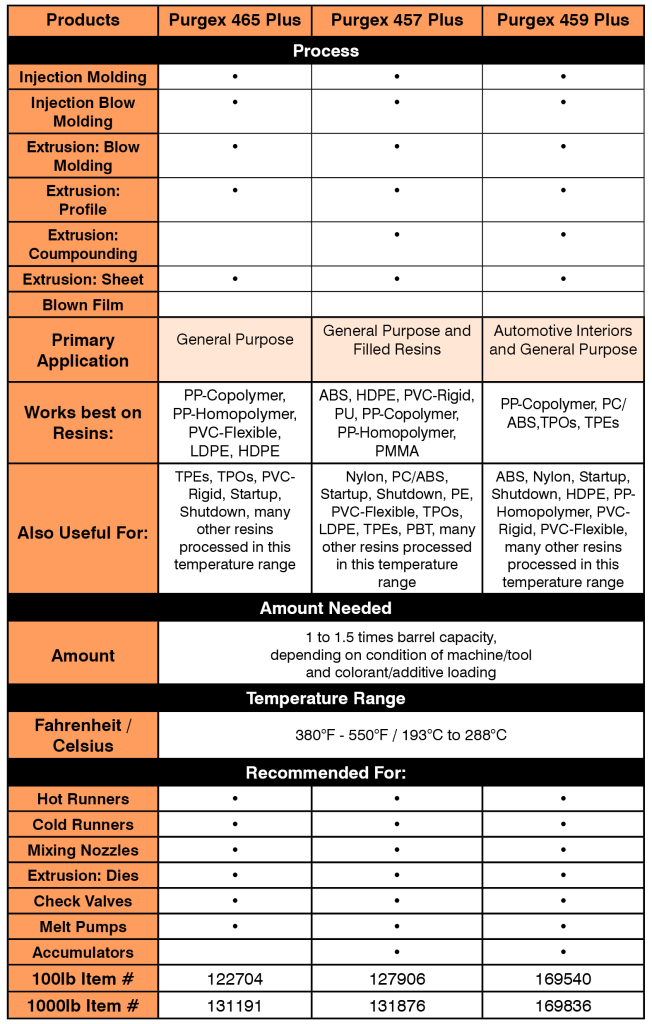
Select your process, resin and temperature to find your Purgex Grade


-
Air Wipe™
August 12, 2022
Provides a Uniform, 360° Stream of Air – Perfect for non-contact blow-off, cleaning, drying and cooling of extruded shapes, pipe, cable, hose etc.
- Performs better, runs quieter and is much more efficient than conventional air nozzles in such applications.
- Helps Reduce Production Costs
- 5 Year Warranty
Use To:
- Blow-off dust and dirt
- Remove excess coatings
- Dry after printing or plating
- Cool hot, extruded shapes
Can be supported by the compressed air supply pipe. Tapped holes (¼”-20) on the bottom of the body can also be used for mounting.

Variable Velocity
Thickness of Plastic Shim between cap and body (.002” standard) determines force and flow of air stream. Thicker and thinner Shims (sets available below) can be used to increase or decrease airflow.
A pressure regulator on the compressed air supply provides infinite control of flow, force and air consumption.
NOTE: Use of an Air Filter Separator is essential for proper operation.Circular Styling
Directs a consistent flow of air over the entire surface.Quiet
Meets or exceeds OSHA noise requirements.Split Design
Allows easy installation around the surface of the material moving through itLow Air Consumption
Helps reduce production costsAluminum Construction
(NOT recommended for use in corrosive environments)How Does it Work?
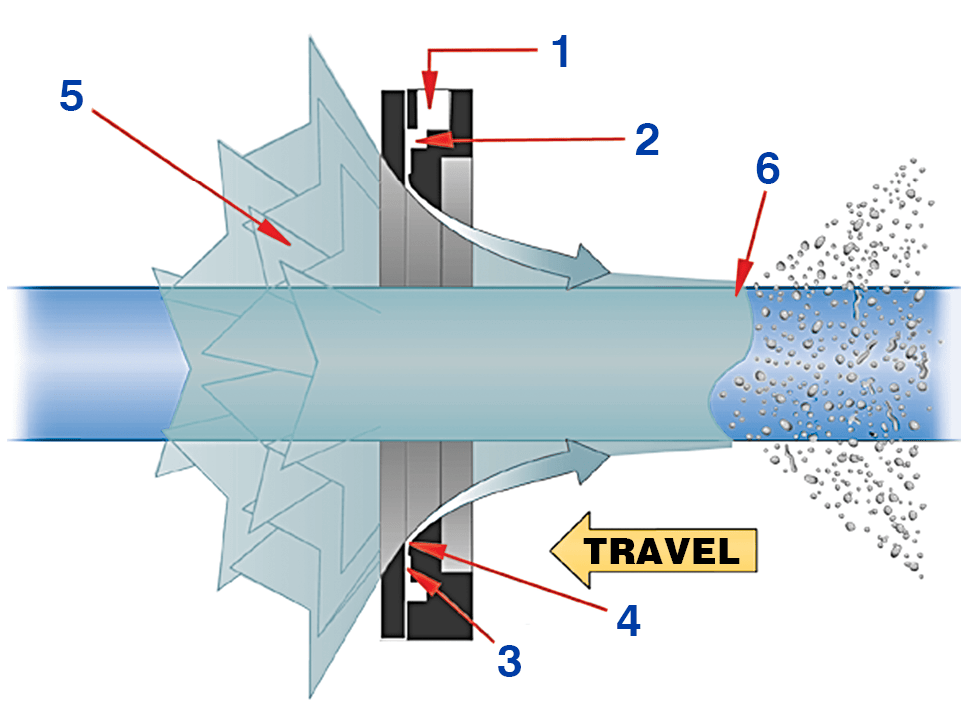
Compressed air flows through an inlet (1) of the Air Wipe into an annular chamber. (2) It is then throttled through a small ring nozzle (3) at high velocity. This primary airstream adheres to the coanda profile (4), which directs it down the angled surface of the Air Wipe. A low pressure area is created at the center (5) inducing a high volume flow of surrounding air into the primary airstream. As the airflow leaves the Air Wipe, it creates a conical 360° ring of air that attaches itself to the surface of the material running through it (6), uniformly wiping the entire surface with the high velocity airflow.
No Moving Parts — Nothing to Wear Out or Break!2 Styles to Match Any Application
Standard Air Wipe
- The best in non-corrosive environments
- Designed to work where temperatures do not exceed 150°F (66°C)
- Complete package including a general purpose PVC hose sized up to 4” (120mm)
Super Air Wipe
- Ideal choice for corrosive environments
- Choose from Aluminum models rated up to 400°F (204°C) or Stainless Steel models rated to 800°F (427°C) depending on your operating temperatures
- Constructed with high quality stainless steel screws, shims along with stainless steel wire braided coupling hose sizes up to 4” (120mm)
Perfect for Hundreds of Applications:
- Drying after paint, cleaning, plating or coating
- Cool hot extruded shapes
- Dry extruded profiles, rod & medical tubing
- Blow excess water off auto door gaskets
- Dry tube, hose, wire, & fiber optics
- Clean paint gun tips
- Clean strips or ribbons
- Blowoff of dust and contaminates
- Uniformly wipe surfaces
- Eliminate solution carryover – stop contamination
- Remove excess coatings, water and oil
- Minimize solution loss due to drag-out
- Dry screen printed or in jetted surfaces
-
Quick Change Fittings & Thread Profile Sizing
July 21, 2022
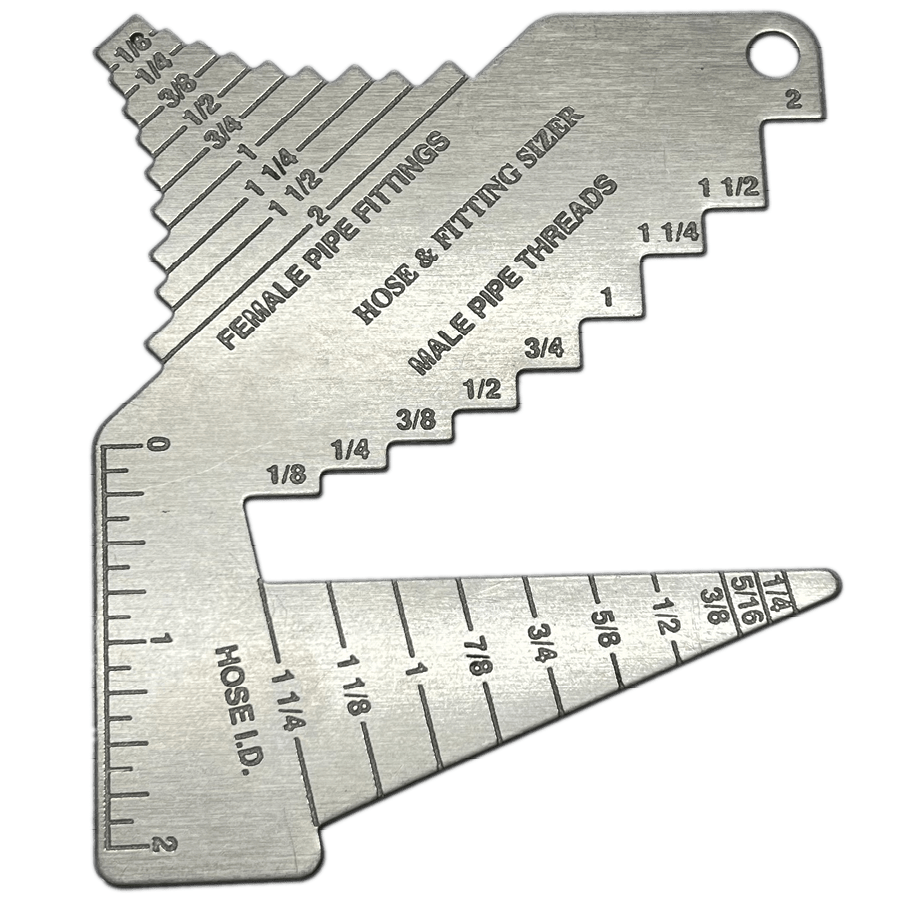
IMS Hose and Fitting Sizer
Made Exclusively by IMS for Injection Molders
For fast, accurate hose I.D. and pipe thread identification- Easy to use, compact
- Decrease installation time
- Great for mold setup and maintenance
Durable 22 Gauge Stainless Steel
With etched numbers and letteringCoupler / Waterline / Thread
Quick Reference Charts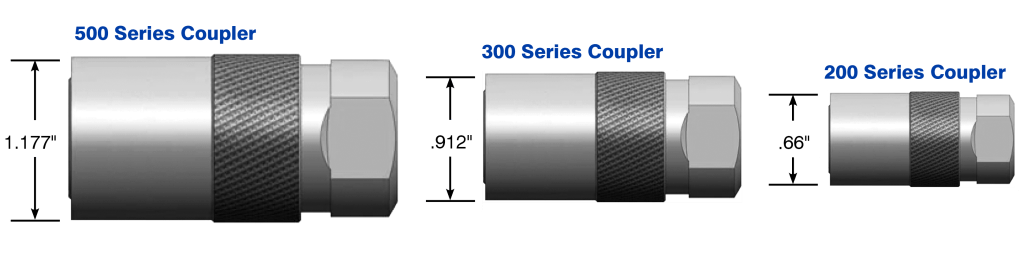
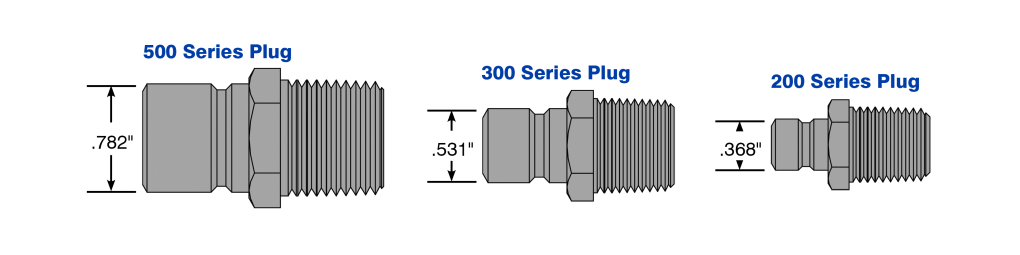
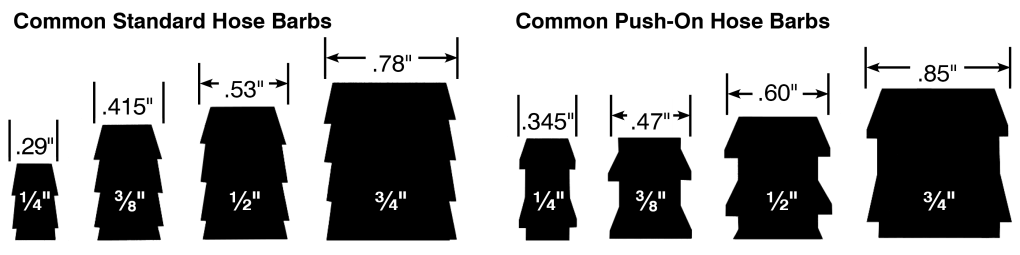
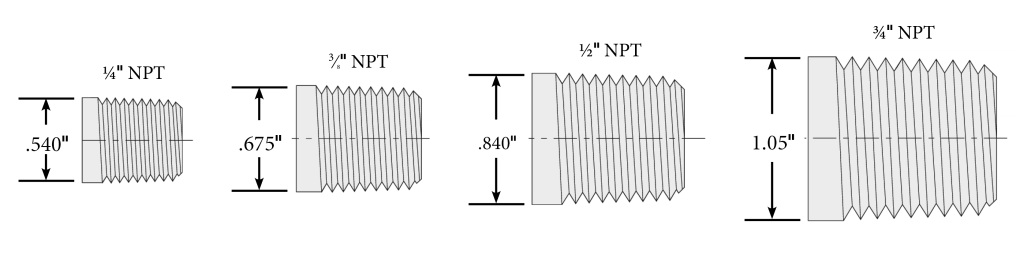
Pipe Thread Data
Most ordering mistakes are caused be measuring the pipe size of the fitting or component incorrectly. The normal size of any pipe does not in the fact refer to either the outside diameter (O.D.) or the inside diameter (I.D.) of the pipe. The table lists standard pipe sizes along with the actual O.D. and I.D. for each size. Keep in mind that manufactures may slightly modify these dimensions to strengthen or enhance the performance of a product.
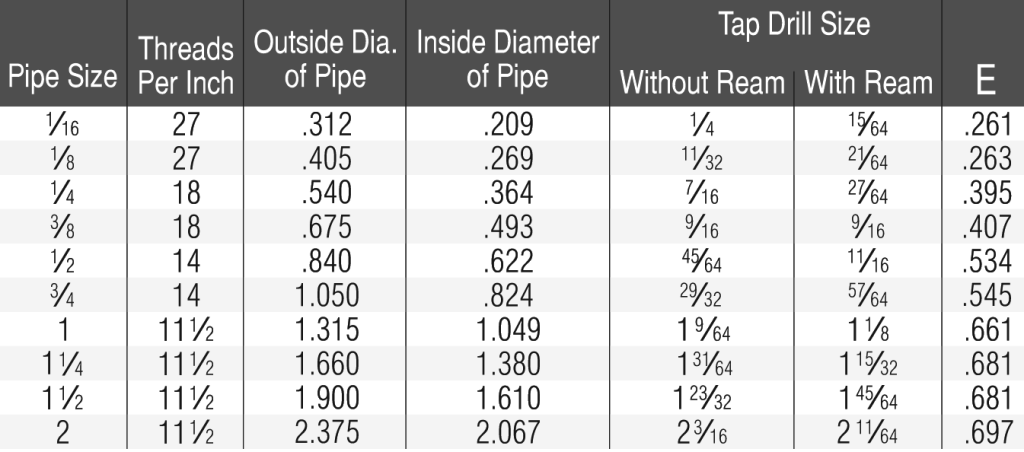

-
Safety First!
June 20, 2022
On November 3, 2021 the Bureau of Labor Statistics reported private industry employers documented 2.7 million nonfatal workplace injuries and illnesses in 2020, down from 2.8 million in 2019, a decrease of 5.7 percent.
Keep your people safe and your business running smoothly.
While it may lack the bells and whistles, Workplace Health and Safety is a topic of high importance in industrial professions. In order to properly implement safety precautions and foster a culture that results in lasting sustainable protocol that prioritizes safety, productivity, quality, and efficiency, you’ll need to train all employees on best safety practices and regularly conduct workplace safety training. With such a large topic, it can be overwhelming to find the tools to fit your workplace needs. In this blog, we will examine tips, tricks, and resources on how to effectively implement workplace safety.
Resource: OSHA Online Training
OSHA opened for business in April 1971 and covered 56 million workers at 3.5 million workplaces. Today, 105 million private-sector workers and employers at 6.9 million sites look to OSHA for guidance on workplace safety and health issues.
As reported by the U.S. Department of Labor, rates of accidents and health problems in the workplace went from 10.9 cases per 100 workers in 1972, to 2.8 cases in 2018.
A great resource for all employees – workers, supervisors, and managers – is the OSHA Authorized Outreach Training online courses. There you will find a wide range of courses for various industries.

Communication
Communicate safety hazards with your peers and managers. Ensure all employees understand WHAT the safety procedures are and WHY they are in place. Host regular safety training to build and maintain emergency response skills so employees can quickly respond when incidents happen and keep operations running smoothly. Have signage to alert employees to possible hazards. Encourage workers to ask questions and speak to their supervisor if they need more help.
Safety Signs
Safety signs and symbols are easily recognizable graphic labels that represent general protocol and safety instructions in workplaces, establishments, or public spaces. The appearance of safety signs and symbols can sometimes vary depending on the country or region, but their general goal is to communicate safety information that transcends language barriers and can be interpreted globally.
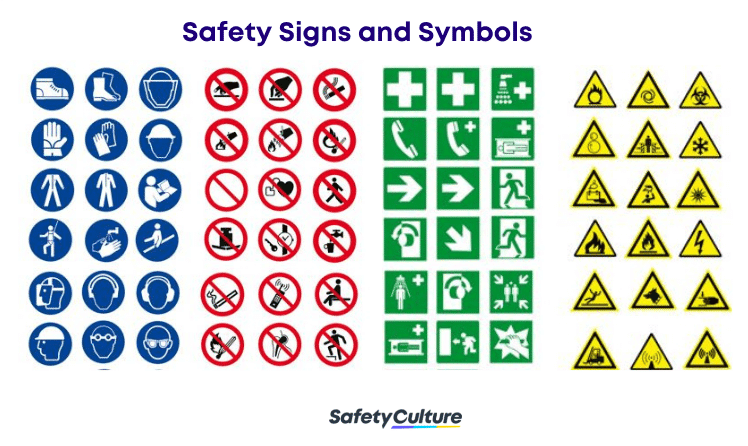
Safety signs and symbols inform individuals of the presence of hazards, dangers, or risks associated with certain items or places. Free Download: the Required Components of OSHA Safety Signs Guide.
Personal Protective Equipment (PPE)
Always provide all employees with Personal Protective Equipment to minimize the risk of injury. This can include gloves, helmets, eye and hearing protection, face masks, harnesses, and more. Check often that PPE is in good working order and fits properly.
Clean Up
Keep equipment and floors clean and free of debris. This helps you prevent slips and falls on wet or dirty floors and avoid accidents on poorly maintained tools and machines.
Take A Break
Give your employees a chance to rest, recharge, and focus. Tired employees are a liability in the workshop as they can potentially harm themselves or others.
According to the National Safety Council, 75% of injury and illnesses leading to days away from work are over exertion and bodily reaction, as well as slips, trips, and falls.
Slow Down
Encourage your team to prioritize safety over speed. Put procedures and workflows in place to intended to avoid risk and make sure all employees follow them.
Keep Records
Maintain a record of all training sessions, and attendance for those sessions so you know who’s been trained on what. Keep records of all safety incidents and accidents. Use these records to for training purposes to identify what caused the issue, how it can be prevented or handled in the future.
Finally, Stay Up to Date!
Even with extensive workshop experience, workshop safety is a skill that should be refreshed regularly. Procedures, protocols, or even equipment can change frequently in the workplace, so ensure workers are always aware and up to date with these changes.
-
IMS Screw Tip BRODY-Ring
Postpone Barrel Repairs – Improve Press Performance
June 15, 2022
- Shorter screw travel for faster cycles
- End all O.D. blow-back
- Positive injection pressure
- Consistent shot control
- Color changes made quicker
- Retrofit MOST tips
- Give new press performance on any injection machine — even with a worn barrel
Extend Barrel Life 2 to 3X!
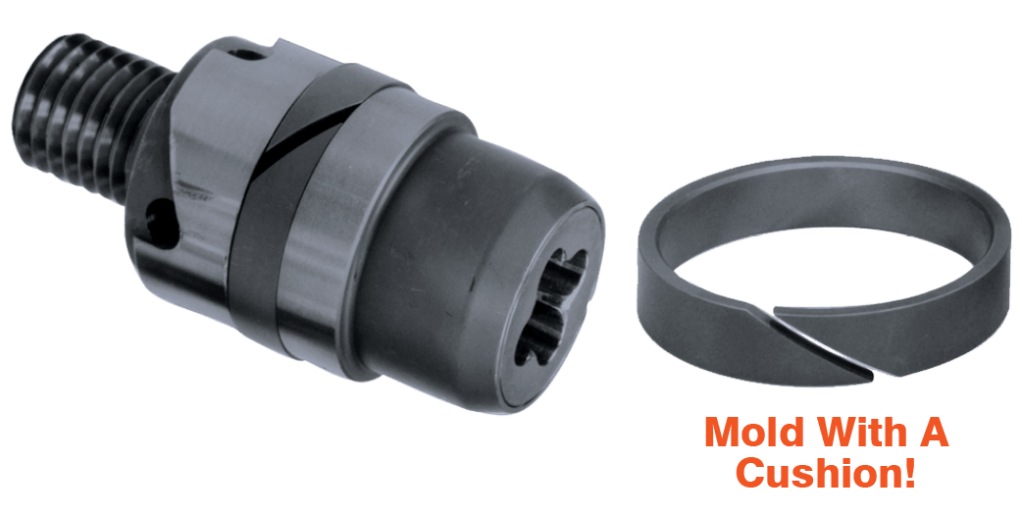
BRODY-ring on a 50 mm Van Dorn Ball Check Screw Tip Stop Screw Tip Blow-By With A BRODY-Ring!
The introduction of the BRODY-ring was a major breakthrough in improving Reciprocating-Screw Press efficiency. Try a tip with a BRODY-ring. It will make your old press perform better than new. If your barrel is worn, the results are even more positive because you can postpone a barrel relining job until your job is completed and you can afford the downtime.
The IMS BRODY-ring molds with a cushion, allowing you to mold better parts. This ensures perfect fills every time. It maximizes part strength and lets you hold critical part dimensions more closely because you exert the same pressure on every shot. Helps minimize part strains.
The BRODY-ring prevents blow-by around the sliding ring or ball check tip. It speeds color changes because there is no space between the ring and the tip where material can hang up, burn and contaminate.
Positive shut-off of the BRODY-ring stops the jetting back of plastic around the O.D. of the sliding ring or tip body. This reduces frictional heat created by the plastic as it leaks back around the tip while you are trying to fill the part.
BRODY-rings can allow you to cut cycle time too. You do not have to OVER-STROKE (or over-retract) your screw to compensate for all the plastic that leaks back past ordinary tips of whatever design. By allowing you to shorten your screw stroke, you save cycle time. So mold with a cushion and make better parts faster!
-
Essential Barrel Information
Tool Steel-Lined Barrels
June 15, 2022
Premature and uneven cylinder wear is expensive in terms of both replacement costs and lost process efficiency. IMS barrels are lined with your needs in mind. For low abrasion applications, we keep your costs down by using D-2 tool steel.
Barrel Liner Material Guidelines
D-2 Tool Steel
Heat treated to RC 58-60, D-2 is a relatively inexpensive, high carbon-high chromium steel with proven, uniform wear resistance surpassing most other steels.Nitrided Barrels
Lined with Nitralloy 135M. Gas nitriding is available on barrels. Not recommended for use with abrasive or corrosive resins due to their inability to resist wear over an extended period of time.
CPM Family
CPM tool steels are premier products of Crucible Specialty Metals Division. The process of producing CPM tools involves gas atomization of pre-alloyed molten steel to form powder that is then isostatically compressed into 100% dense compacts. CPM steels have no alloy segregation and exhibit extremely uniform carbide distribution. The CPM process produces very homogeneous, high quality steel characterized by superior dimensional stability, grindability, and toughness compared to steels produced by conventional processes.
CPM9V
With a lower carbon and vanadium to improve toughness and heat check resistance, CPM9V performs well in problem applications where high carbon, high chromium tool steels, such as CPM10V or the high speed steels, lack sufficient toughness or heat check resistance, or where lower alloy tool steels and hot work tool steels lack sufficient wear resistance.CPM10V
CPM10V has its vanadium content optimized to provide superior wear resistance while maintaining toughness and fabrication characteristics comparable to D2 and M2. Its exceptional wear resistance and good toughness make it an excellent candidate to replace carbide and other highly wear resistant materials in cold work tooling applications, particularly where tool oughness is a problem or where cost effectiveness can be demonstrated. Due to it’s 10% vanadium content, this steel is one of the most abrasion resistant materials available.CPM15V
Intended for applications requiring exceptional wear resistance. It has more vanadium carbides in its composite than CPM10V and provides more wear resistance and longer tool life. CPM15V also offers an alternative to solid carbide where carbide fails by fracture or where intricate tool design makes carbide difficult or risky to fabricate. Due to it’s 15% vanadium content CPM15V will outwear CPM10V.CPMS90V
A stainless steel with a high volume of vanadium carbides for exceptionally good wear resistance. Due to its high vanadium content for wear resistance and it’s sufficient chromium content, to provide good corrosion resistance, the wear and corrosion resistance of S90V make it an excellent candidate where increased wear is a primary concern. It can be heat treated to a lower hardness for use as a screw material or to a higher hardness (RC 58-60) for barrel lining.
Nitrided Barrels
Nitrided barrels may be made from 4140 but a nitriding steel, such as Nitralloy 135M enables a better nitrided interior surface to be achieved. Two nitriding methods are available: gas nitriding and ion nitriding.
Gas Nitriding
Gas Nitriding is used to create a surface hardness on the screw. The hard layer of steel will vary in depth from .007” to .015” depending upon the length of the nitriding cycle. The hard layer (usually well above 60 Rc) is achieved by heating the steel in an atmosphere of nitrogen (ammonia gas) at temperatures of 950˚F to 1050˚F. The nitrogen atoms are diffused into the surface of the steel, combining with nitride-forming elements, such as chromium, aluminum, molybdenum, vanadium, tungsten and titanium, to produce a very hard surface, particularly for the first .002” to .005” depth. Nitrided screws have a very good wear resistance until the surface hardness is worn away. After the surface is worn .007”, wear accelerates and the screw may quickly be worn to a condition that is beyond repair.Ion Nitriding
Ion nitriding is similar to gas nitriding, using an electrical potential to ionize low pressure nitrogen gas. The ions produced are accelerated to the surface of the steel, heating it to a temperature for diffusion to take place (i.e., the uniting of the atomic nitrogen with the nitride-bearing elements in the steel). Because the temperatures are lower and pressures more controllable, a more uniform surface hardness depth may be achieved. The ionization occurs in a plasma discharge process which creates a glow, hence, this type of nitriding is also referred to as the ‘plasma method’ or ‘glow discharge’ nitriding.Nitrided barrels are not recommended for use with abrasive or corrosive resins because of their inability to resist wear over an extended time period.

Bimetallic Barrels
Cast bimetallic barrels are manufactured by metallurgically bonding the lining alloy to the inner surface of a pre-machined, seamless steel tube, forging or bar stock. The bonding is achieved by heating the barrel (and the lining alloy) to the point where the alloy is melted. The barrel is then spun and cooled, centrifugally casting the alloy on the inner surface of the barrel. The casting is typically .040” – .080” in depth.
The linings range from standard abrasion-resistant, to corrosion-resistant, to premium. Each provides different degrees of wear resistance.
IMS manufactures bimetallic barrels in-house using top of the line cast bimetallic barrel blanks. We carry in inventory most common sizes of these barrel blanks in order to meet our customer’s needs.
Standard Bimetallic
Standard wear-resistant liner. Nickel-Boron alloy with good abrasion resistance and low friction co-efficient.Carbide Bimetallic
Super wear-resistant tungsten carbide liner. For highly abrasive applications. Some corrosion resistance.Premium Bimetallic
Corrosion resistant liner. Cobalt-nickel based with high chromium content. Provides excellent wear resistance in highly corrosive conditions.Relined Barrels
IMS offers full-length relining of barrels up to eight (8) inches in diameter and 180” inches in length, using premium tool steels and special alloys, depending upon the customer’s need.
Upon receipt of your barrel, our engineers will do a thorough inspection of your barrel. We will then contact you with a quote for repair, either by phone or fax. At that time you will have the option of proceeding with the work (upon IMS’s receipt of your purchase order approval), having IMS return the barrel to you or having us dispose of it.
AN IMS ALTERNATIVE: R215 Carbide bound liner: We start with a solid piece of 4100 series tool steel with a bored ID. CO56 powder is then placed in the 4100 series barrel, heated up and spun. This makes the CO56 melt and stick to the inside of the barrel, similar to a sleeve. It is then bored to manufacturer specs and polished. This barrel can be later bored out and resleeved w/carbide or tool steel if necessary.
Bonding is achieved by heating the barrel (and the lining alloy) to the point where the alloy is melted. The barrel is then spun and cooled, centrifugally casting the alloy on the inner surface of the barrel. The resulting lining is about 1/16” (.0625”) thick throughout the barrel. Due to the temperatures reached in the spin-casting process, the 4100 series backing material is annealed. In larger barrels, a pressure sleeve made from heat treated or forged alloy steel is placed over the nozzle end
of the barrel by shrink fitting.
CPM – Crucible Materials Corporation N/A – Not Acceptable (1) All Thermoplastics without reinforcement or abrasive fillers.
(2) Thermoplastics with abrasive reinforcement or fillers up to 30%.
(3) Thermoplastics with 30% or more reinforcements or abrasive fillers and thermosets.
(4) Cellulosics, lonomers, Acetals and others containing corrosive additives.
(5) Fluoropolymers.Measuring Barrel Wear
- Clean the barrel ID, while hot, with a soft wire or brass brush, preferably wrapped with copper gauze. Allow to cool to room temperature.
- Set dial bore gage to nominal bore diameter of the barrel. Record your findings, taking a reading along the ID of the barrel every 2 – 3 inches. Examine condition of barrel ID, looking for any “washed out” areas, cracks and gouges. Inspect feed throat area and end cap.
-
Screw Tip Wear Issues
June 15, 2022
Cracked Ring: Excessive barrel wear in the metering area. Unmelted plastic in the valve can cause a situation where the ring will not seat against the rear seat. This is usually due to a poor start up or shut down.
Broken Stud: This is usually due to a poor start up or shut down procedures. Failure to make sure barrel is up to operating temperature at start up or failure to properly purge barrel and screw at shut down.
Slow Recovery: Excessive back pressure is the most common cause. However, if there is excessive wear between the front seat and ring it can impede the movement of plasticized material and screw recovery can be drastically affected.
Failure To Hold Cushion: Excessive wear on the seating areas can allow material to pass back over the valve or ball check.
Poor Quality Consistency: Excessive wear on the seating areas can allow material to pass back over the valve or ball check.

D-2 Tool Steel
Heat treated to Rc 58-60, D-2 is a relatively inexpensive, high carbon-high chromium steel with proven, uniform wear resistance surpassing most other steels.H-13 Nitrided
Tool steel with good strength that is thru-hardened and ground dimensionally then nitrided for 72 hours.
A tough material good for general applications.CPM9V
Highly wear resistant tool steel with a high percentage of vanadium carbide. Excellent for abrasive applications.CPM420V
Ideal for highly corrosive applications. 420V also has significant wear resistant characteristics.NOTE: If your screw is turning during injection, it’s a good indication that your non return valve is leaking.